
Choose the right snapshot, restore into a fresh isolated directory, and check content, permissions and usability. These Linux examples explain both the workflow and its failure criteria.
Direct answer: filter snapshots by host and backup path, pin a snapshot ID, and inspect its internal paths with restic ls. Restore the required directory to a new target with restore --include --verify. Then check the expected version, file content, access controls and a representative business read. A successful check, a zero restore exit code and a file that opens each establish only part of the evidence.
Scope and prerequisites
This workflow is for an existing restic repository containing ordinary files, such as departmental documents or application exports. Examples assume Linux, Bash and GNU coreutils. Commands were checked against restic 0.19.1 documentation; inspect local help before using them on an older version. Paths, snapshot IDs and capacities are operation examples; replace them with values from your environment.
Running databases, VM images and full system recovery require their own consistency and recovery procedures. Copying a database data directory does not establish a recoverable database. Start with the enterprise recovery rehearsal guide if your recovery objectives have not been agreed.
| Requirement | How to check | Stop condition |
|---|---|---|
| Repository and decryption access | Open it from the drill account and list snapshots | Resolve access or key custody; do not initialize a replacement repository |
| Separate restore destination | Inspect mounts, resolved paths and directory contents | Change the destination if it overlaps production or the repository |
| Sufficient capacity and inodes | Use df -h and df -i; estimate restored file sizes | Expand capacity or reduce the approved scope |
| A comparison baseline | Keep a backup-time inventory, hashes, permissions and version | Record limited evidence if no trustworthy baseline exists |
| Isolation and acceptance owner | Ensure production jobs cannot consume restored files | Do not restore until isolation is established |
A local ext4 or XFS destination can represent Unix metadata. FAT/exFAT, some network mounts and cross-platform restores may not preserve the same ownership, permissions or attributes. Set explicit acceptance boundaries. Compressed, deduplicated repository usage is not the required destination capacity.
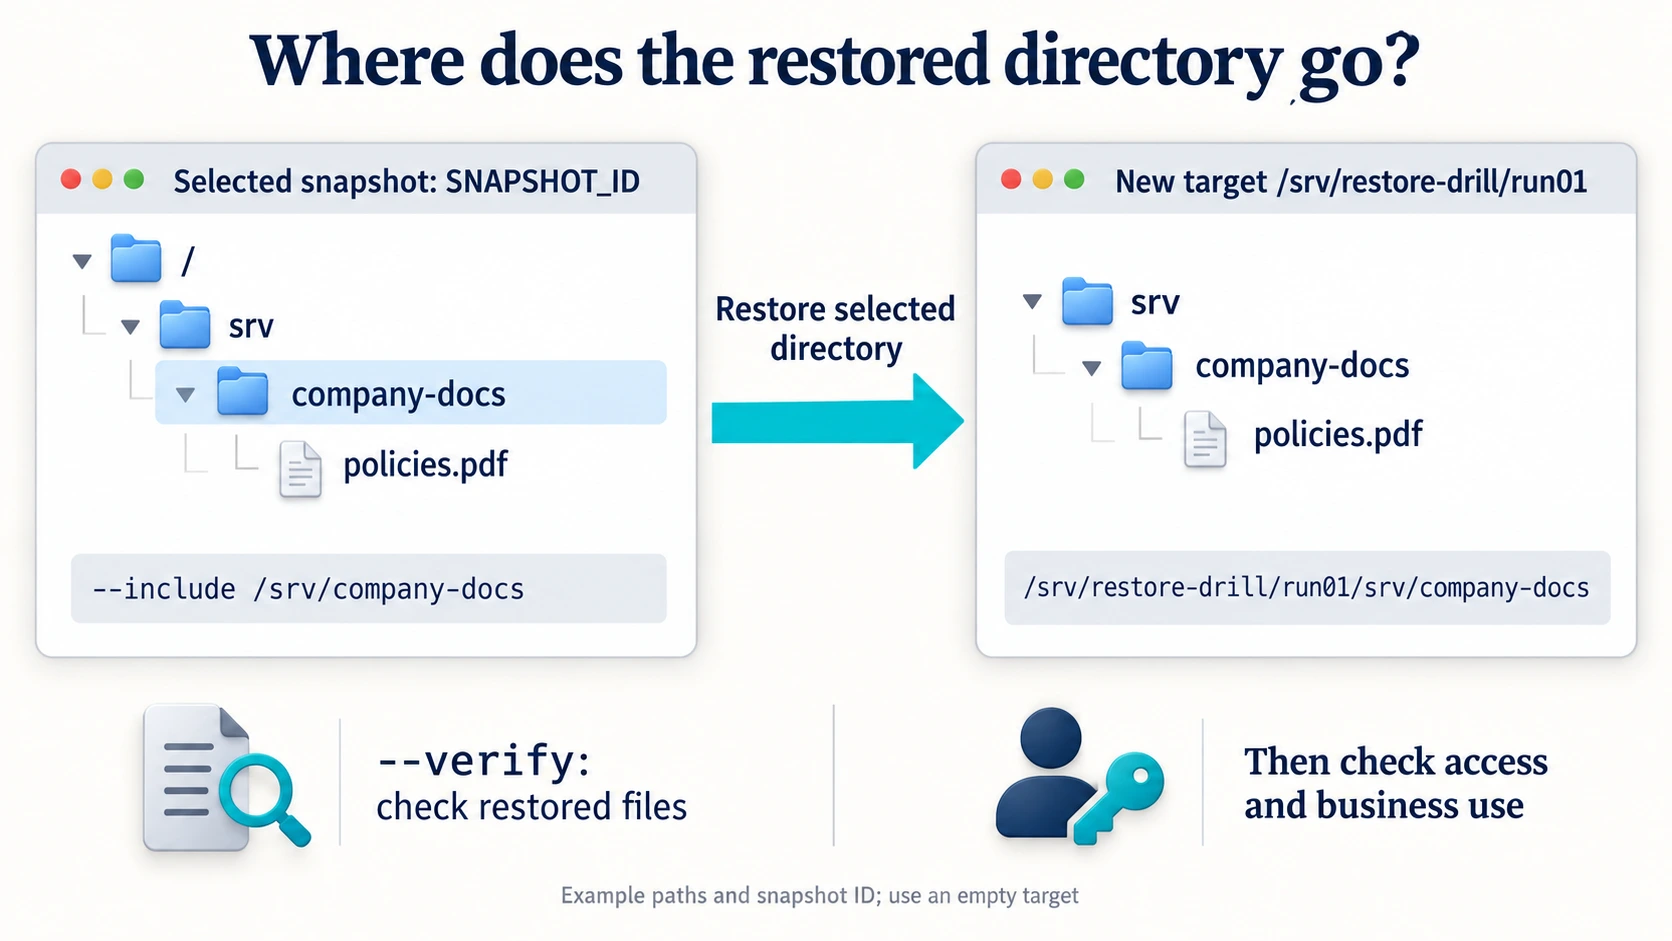
Diagram: Restore path: /srv/company-docs in the snapshot appears at /srv/restore-drill/run01/srv/company-docs beneath the new target. --verify checks restored files; access and business use still require acceptance. Paths and IDs are examples; confirm the target is empty. Open full-resolution image
Step 1: check the version and pin the snapshot
Use an authorized drill terminal. Replace /mnt/backup/restic-repo, filesrv01 and /srv/company-docs with your actual repository, source host and backup path. Let restic prompt for the repository password; keep it out of commands, shell history and reports. Use your approved cloud or SFTP connection setup. Consult the installation guide and repository setup documentation for platform and backend requirements.
restic version
restic restore --help
restic -r /mnt/backup/restic-repo snapshots \
  --host filesrv01 --path /srv/company-docs
restic -r /mnt/backup/restic-repo snapshots --json \
  --host filesrv01 --path /srv/company-docs
The JSON id field supplies the full snapshot ID; do not record a short ID as a full one. Check timestamp and time zone, Host, Paths and Tags. Select a pre-incident snapshot that meets your recovery objective, and record its full ID. --path filters snapshots; it does not restrict restored content. In a repository with several hosts or jobs, latest may select unrelated data. Pin the selected ID for this drill.
Replace the SNAPSHOT_ID placeholder before running:
restic -r /mnt/backup/restic-repo ls SNAPSHOT_IDExpect the snapshot tree to contain /srv/company-docs and its files. Relative backup paths may produce a different internal layout; trust the actual ls output. If the directory is absent, check snapshot selection and backup scope rather than guessing a path. See the official restore guide.
Step 2: distinguish repository checks from restoration
A normal repository check inspects structure. A full read-data check also reads stored pack data, which may require a long maintenance window and paid cloud transfer. Report the actual coverage when you choose a subset instead. The repository integrity documentation explains the distinction.
restic -r /mnt/backup/restic-repo check
  # Schedule a suitable window before reading all stored data.
restic -r /mnt/backup/restic-repo check --read-data
For example, check --read-data-subset=1/5 checks one group of packs, not the entire repository. Even a full repository check does not establish destination capacity, correct business version, usable permissions or application readiness. Stop acceptance on corruption, missing objects or a nonzero exit code. Preserve logs and investigate storage and connectivity; do not run repair, prune or unlock merely to obtain a green report.
Step 3: preview the scope and restore into a new directory
The following block requires Bash. An administrator must first prepare /srv/restore-drill on the intended mount with restricted access and write permission for the restore account. Keep it outside both the repository and production shares. mktemp -d creates a fresh directory for this run, avoiding leftovers from a previous drill.
  # Run in one Bash session. Prepare and inspect the parent beforehand.
repo='/mnt/backup/restic-repo'
snapshot='REPLACE_WITH_REAL_SNAPSHOT_ID'
source_path='/srv/company-docs'
restore_parent='/srv/restore-drill'

test -d "$restore_parent" || exit 1
df -h "$restore_parent"
df -i "$restore_parent"
target=$(mktemp -d "$restore_parent/restic-XXXXXX") || exit 1
printf 'Restore target: %s\n' "$target"

restic -r "$repo" restore "$snapshot" \
  --target "$target" --include "$source_path" --dry-run --verbose=2
preview_rc=$?
printf 'Preview exit code: %s\n' "$preview_rc"
test "$preview_rc" -eq 0 || exit "$preview_rc"
The preview should show only the intended tree. Investigate unrelated departmental folders, unexpected path nesting or a destination that could overwrite production. A dry run does not restore files. If your installed version lacks the option, resolve version compatibility before proceeding.
After confirming scope and destination, run this block in the same terminal. --verify rereads and verifies data after restoration; it is not a simulation. The post-restore verification call can be inspected in the official v0.19.1 source. --include must match the actual snapshot path. Paths containing wildcard characters need separate checking against the documented pattern rules.
started=$(date +%s)
restic -r "$repo" restore "$snapshot" \
  --target "$target" --include "$source_path" --verify
restore_rc=$?
finished=$(date +%s)
printf 'Restore exit code: %s; elapsed seconds: %s\n' \
  "$restore_rc" "$((finished-started))"
test "$restore_rc" -eq 0 || exit "$restore_rc"
With this full-snapshot restore and --include /srv/company-docs, files land under $target/srv/company-docs, not directly under $target. This example does not use the subtree syntax SNAPSHOT_ID:/subfolder, which changes the layout. Since restic can overwrite existing destination files by default, use a fresh empty directory and omit --delete.
Zero is a necessary condition for further acceptance, not its conclusion. Preserve and resolve any nonzero code, verification failure, I/O error, capacity error or metadata warning. Treat unknown exit codes as failures, as described in the official scripting documentation.
Step 4: compare content, permissions and actual use
Use a trustworthy GNU sha256sum manifest generated at the backup time and corresponding to this snapshot. It should contain paths relative to /srv/company-docs and be kept separately. /srv/drill-evidence/company-docs.sha256 below is an example location, not a supplied production baseline. Do not compare against a changing live directory, or generate hashes from restored files and compare them with themselves.
restored_root="$target/srv/company-docs"
test -d "$restored_root" || exit 1
(
  cd "$restored_root" || exit 1
  sha256sum --check --strict /srv/drill-evidence/company-docs.sha256
)
hash_rc=$?
printf 'Manifest check exit code: %s\n' "$hash_rc"
test "$hash_rc" -eq 0 || exit "$hash_rc"

  # Replace this key file with an actual drill sample; read metadata only.
stat -c '%n | %s bytes | %U:%G | %a | %y' \
  "$restored_root/policies.pdf"
--strict fails the check when checksum lines are malformed; see the GNU checksum options. Every listed file should report OK and the command should return zero. A manifest covers only its listed files, not extra files, empty directories, link relationships or permissions. Compare a complete backup-time path inventory for missing and unexpected items. Check a version marker or business date to establish the correct recovery point. Without a trustworthy baseline, record “restored data verified against the snapshot; original business version not independently confirmed.”
stat alone cannot establish permission fidelity. Compare UID/GID, mode bits, ACLs, extended attributes and symbolic links with the baseline. Use getfacl for ACL inspection where applicable; prepare distribution-specific tools if missing. Insufficient privilege to restore ownership, or an incompatible destination filesystem, can leave readable files with incorrect access rules. Do not hide discrepancies with a blanket chmod 777 or recursive ownership changes.
Keep the restored files out of production shares. Test both allowed and denied access with isolated accounts, and ask the data owner to inspect key files in an offline viewer. For application exports, run a read-only query in an isolated test application, with mail, payment, synchronization and scheduled external actions disabled. For shared-file access issues, see the Windows file-share permission guide; its Windows ACL procedures are not Linux commands.
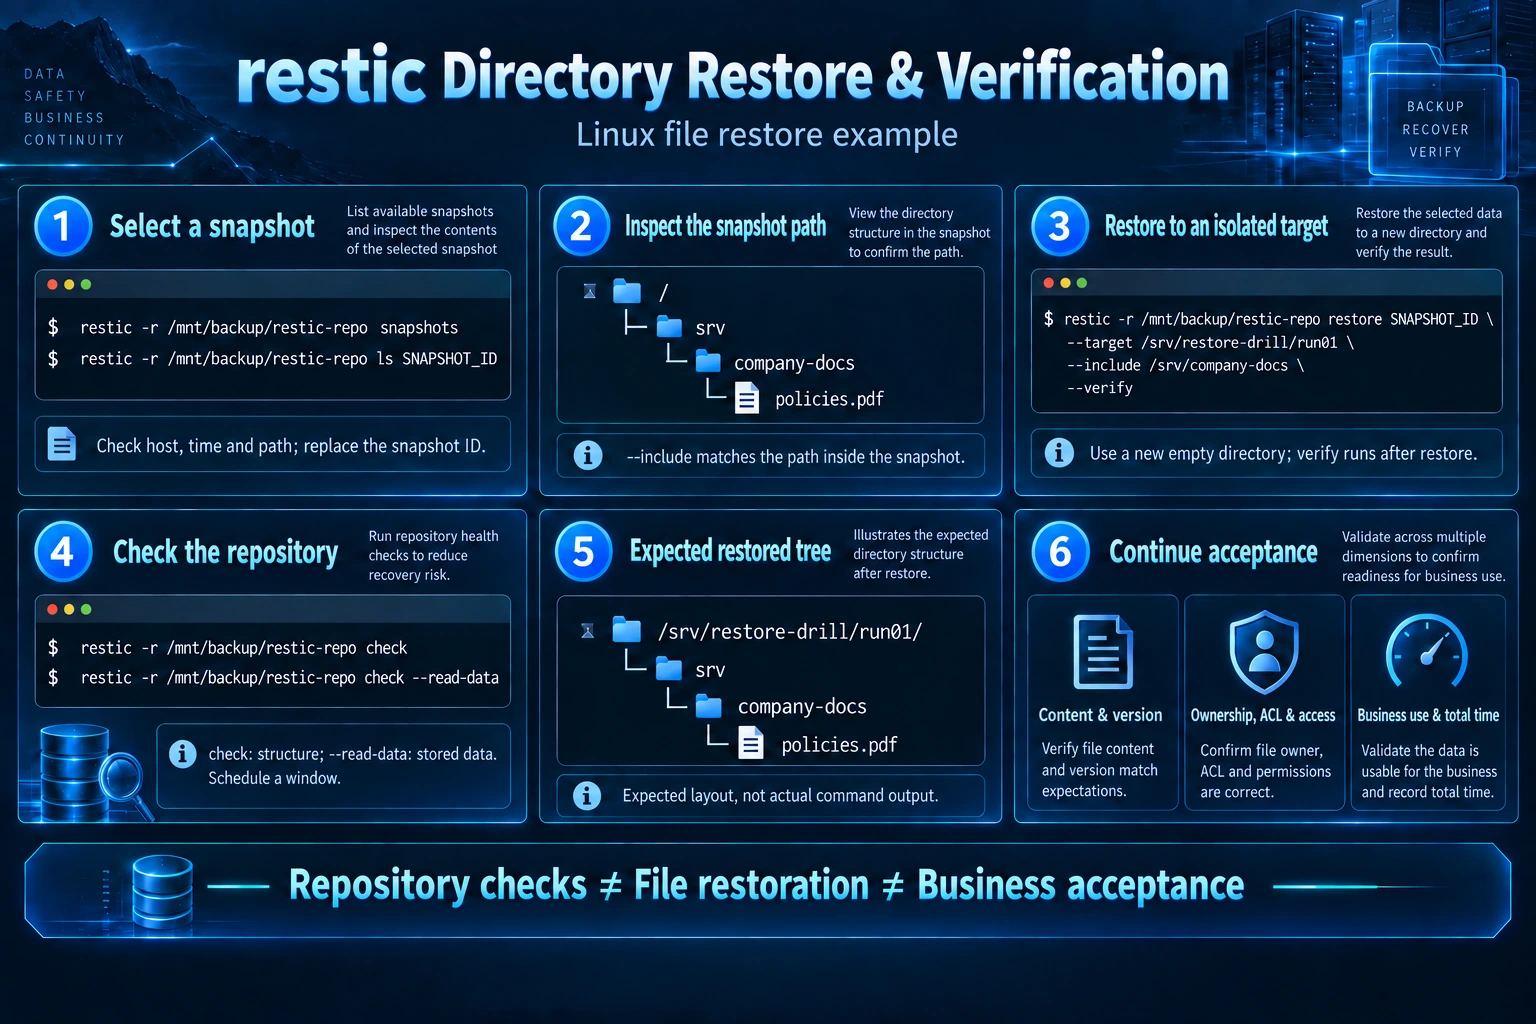
Diagram: Directory restore and verification example. Paths and snapshot IDs are examples. run01 represents a confirmed fresh empty destination; the text uses mktemp for a unique target. Panel numbers organize reading, not mandatory execution order: repository checks precede restoration in the text. Open the full-resolution image for details; copy commands from the text. Open full-resolution image
Acceptance criteria and failure branches
| Observation | Interpretation | Correction and retest |
|---|---|---|
| Wrong snapshot time or directory | Wrong recovery object | Recheck Host, Paths and ID; preview again |
| Lock, connectivity or password failure | Recovery access unavailable | Check active jobs, authorization and network; do not blindly remove locks |
| Data errors in check or verify | Reliability not established for this scope | Preserve object errors; investigate another copy, then restore to a new destination |
| Matching hashes but wrong permissions | Content passes; access controls fail | Correct identity mapping or filesystem choice; retest allowed and denied access |
| Complete files, wrong business version | Wrong recovery point or scope | Reconcile incident time and business version, then choose the correct snapshot |
| Agreed recovery time exceeded | Time objective not met | Separate retrieval, writing, verification and acceptance time; improve and repeat |
RPO is the acceptable data-loss interval; RTO is the target time to restore usable business service. The sample timer covers only the restore command, not full RTO. Repository access, verification, permission repair and business acceptance also belong in the total. Validate RPO against the incident time, snapshot time and actual business version.
Record repository reference, restic version, full snapshot ID/time/host/path, destination, sample scope, command exit codes and warnings, content and permission findings, acceptance owner, total duration, failure actions and retest date. Redact logs and exclude passwords. Limit a successful conclusion to the snapshot and directory actually tested, without extending it to full-system recovery or a long-term guarantee.
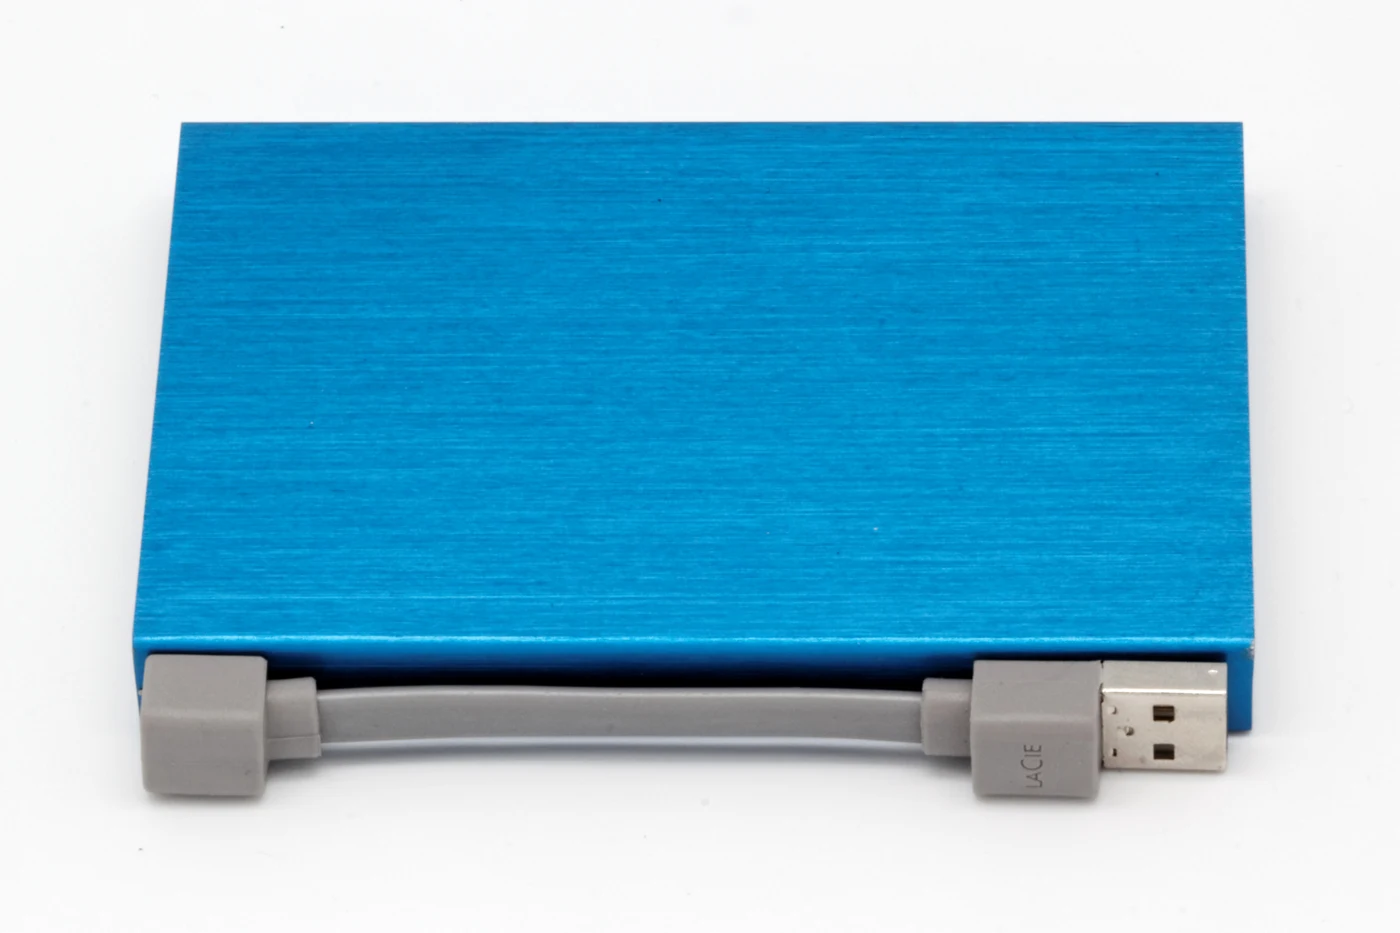
Photograph: Coyau / Wikimedia Commons, CC BY-SA 3.0. The subject is a LaCie 500 GB external drive photographed in 2012; this is a library photograph, not this article's field site. Only resized and converted to WebP; the derivative photograph retains the license. It illustrates physically separable offline media, not a claim about this model's capacity, endurance or suitability, and is not a purchasing recommendation. An offline copy still needs its own restore test.

FAQ
Do I still need to restore if check succeeds?
Yes. Repository checks do not establish destination writes, identity mapping or actual business use. Test the recovery path itself.
Does --verify check without writing files?
No. It verifies data after restoring it. Use --dry-run to preview scope; the options serve different purposes.
Can I restore directly into production?
This drill uses a separate destination. In-place restoration can overwrite files or leave a partial state if interrupted. Incident cutover needs a separately approved backup, rollback plan and business window.
Can a few sample files prove all enterprise backups work?
No. State the exact sample, snapshot, directory and coverage. Databases, system images and other copies need their own acceptance procedures.
Related solution
The Yuqi backup and disaster recovery solution provides a starting point for discussing servers, file backups, isolated recovery and acceptance scope. Implementation depends on the agreed environment and objectives.
Further reading
To review an existing backup, prepare a small anonymized sample, its snapshot time and your recovery-time objective, then discuss the verification scope with Yuqi.