
A useful backup procedure ends with a recovery test. First, save the VM backup to storage that is independent of its original virtual disks. Then restore it under a new VM ID, disconnect every network interface before its first boot, and inspect the recovered system and application data. A successful backup task alone does not establish that the business service can be recovered.
This GUI tutorial targets ordinary QEMU virtual machines on Proxmox VE 8/9. It is an operating example based on official documentation, not a report of a customer recovery. Labels can vary between point releases. Domain controllers, cluster members, databases with special recovery requirements, and VMs using hardware passthrough require a system-specific plan before you proceed.
1. Define the scope and record the example values
The backup destination in this guide is an independent storage device or a file share that an administrator has already mounted. Creating another directory on the original system disk does not provide that independence. Formatting disks, creating filesystems, and configuring persistent mounts are prerequisites handled by the storage administrator; they are outside this GUI procedure.
| Setting | Example | Confirm before proceeding |
|---|---|---|
| Proxmox node | pve01 | Management and console access work |
| Source VM | VM 100 | Owner, disk inventory, and maintenance window are known |
| Backup storage ID | backup-dir | The name is not already used |
| Mounted directory | /mnt/backup | The underlying device/share and capacity are documented |
| Restore VM ID | VM 200 | The ID is unused across the cluster |
| Restored disk storage | local-lvm or another VM-image storage | It supports VM disks and has sufficient real free space |
| First-boot network | Every virtual NIC disconnected | Access is through the PVE console only |
| Startup | Manual | Automatic startup and HA management are disabled |
Calculate capacity separately for the backup file and the restored virtual disks. Compression ratios and thin-provisioned virtual sizes are not substitutes for actual available capacity. Start with one low-risk VM, measure the resulting backup and task duration, and use those observations when planning the next stage. This example does not promise a backup or recovery time.
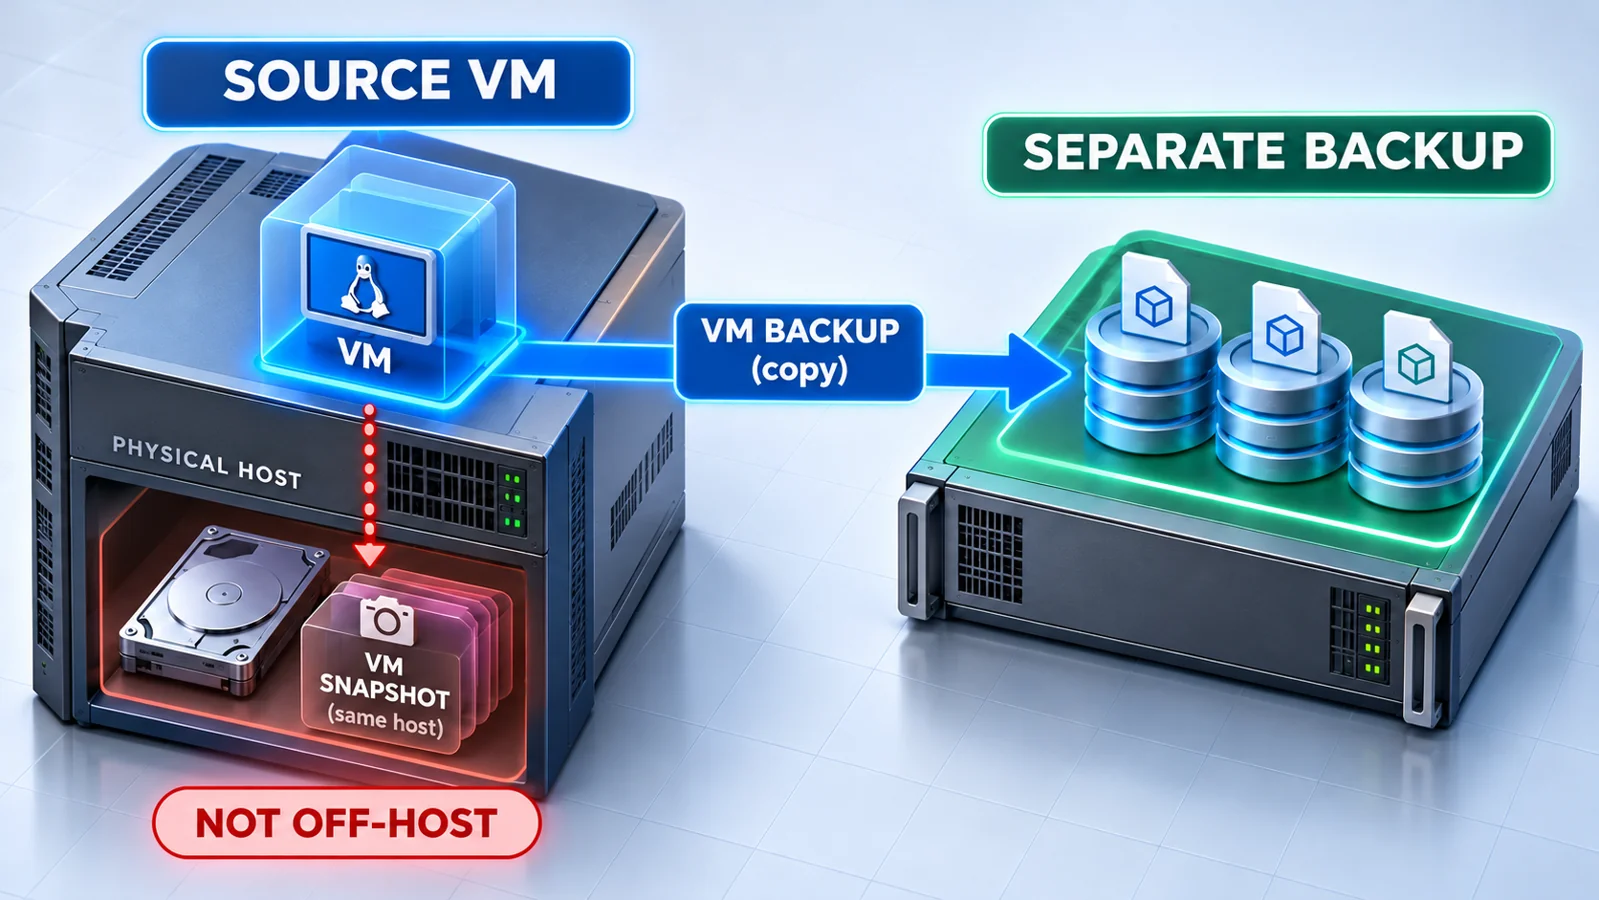
The backup copy reaches an independent device. A local snapshot remains dependent on the source host and storage. The arrows depict backup copying, not a completed recovery test.
2. Confirm that the directory really uses the backup storage
Obtain a mount confirmation from the storage administrator. It should identify the mount directory, backing device or share, filesystem, total and free capacity, and how the mount survives a host restart. A Directory entry in the PVE interface is not sufficient evidence that its backing storage is mounted correctly.
A missing mount can leave an ordinary directory behind. Writing there may fill the PVE host's root filesystem instead of the intended backup device, affecting management services and running guests. A green storage icon, a directory that exists, or a successful small-file write does not by itself exclude this failure. Ask the administrator to validate the mount source and configure a fail-closed availability or write-protection check for a missing mount. Mountpoint-check support must be configured and verified for the installed release; the Shared checkbox does not provide it.
Stop if the mount source is unknown, reported capacity does not match the intended device, or storage reports read-only or I/O errors. Do not silently redirect the task to the host system disk.
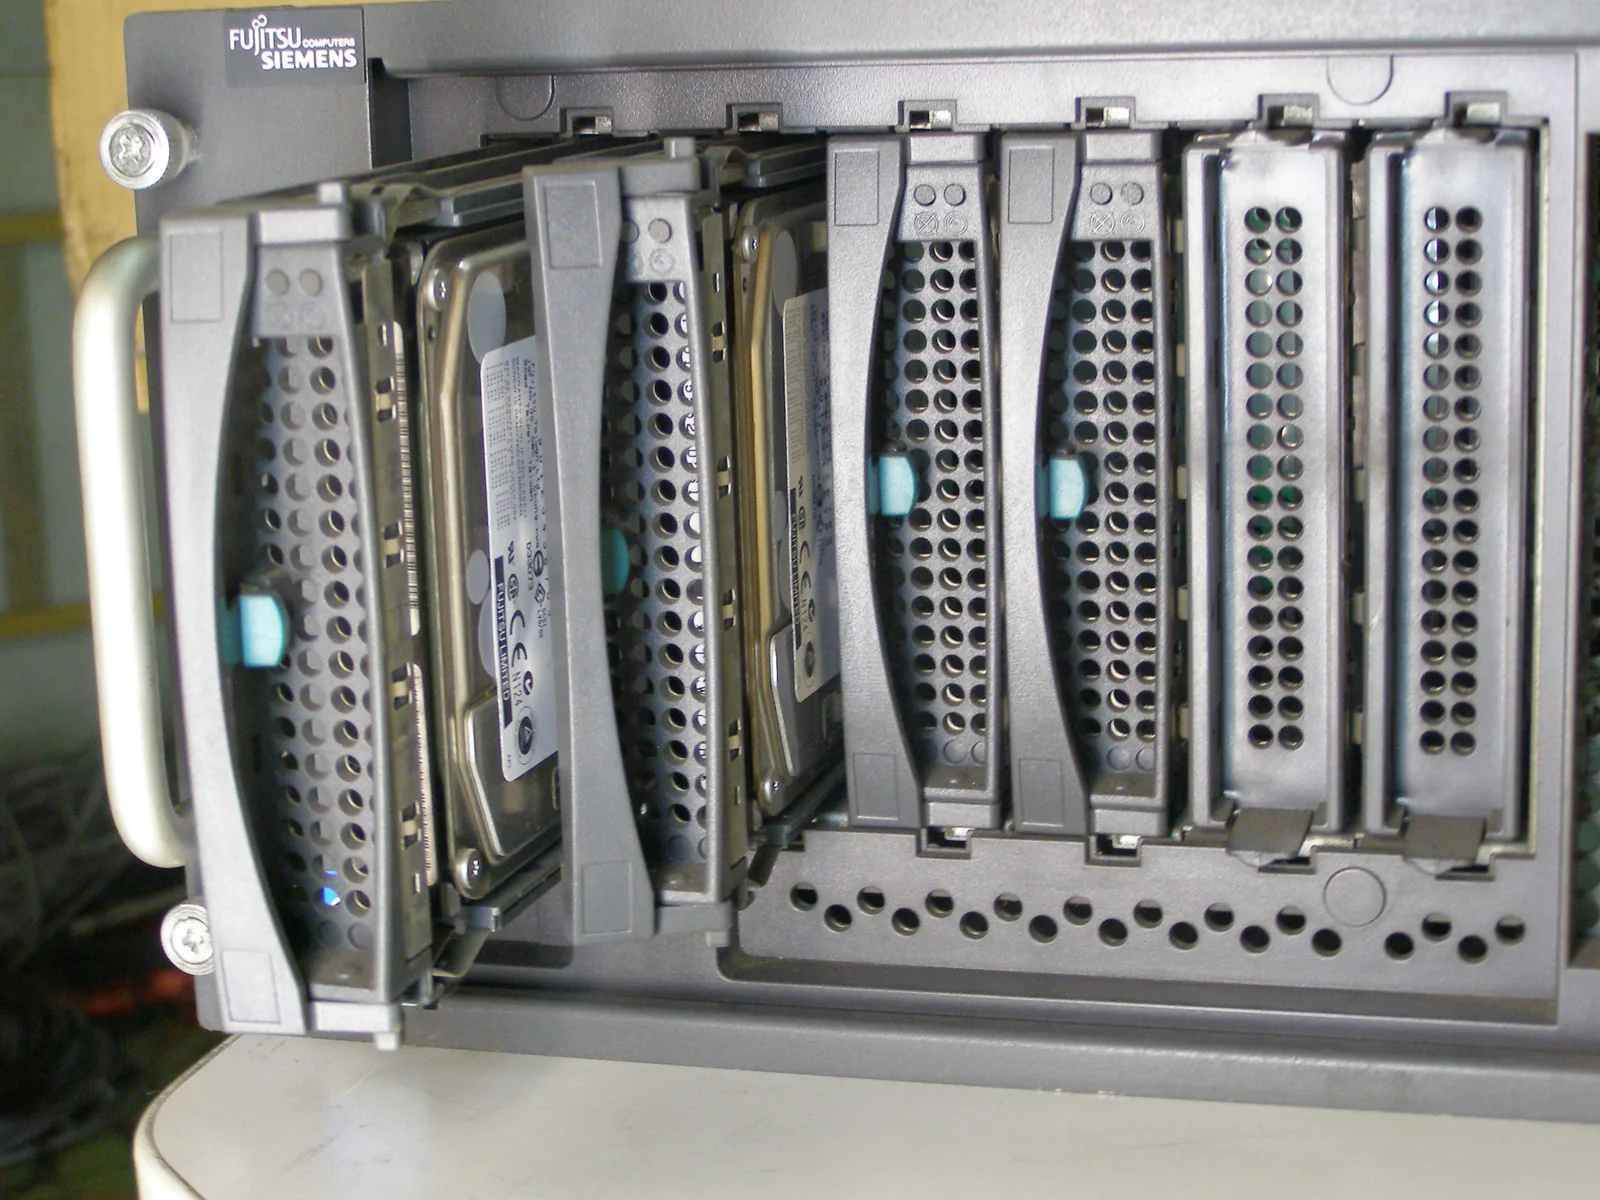
Photo: Mixabest, FSC Primergy TX200 S2 hot-swap drive bay, 2010; original and attribution on Wikimedia Commons, released into the public domain by the author through PD-self. This reference photograph is not from this procedure and does not establish that the pictured server runs Proxmox VE. It has been resized proportionally and encoded as WebP. Independent media reduce dependence on the source storage; they do not automatically provide offline, off-site, or immutable protection.

3. Add a Directory storage for backup files
- Select Datacenter in the left tree, then open Storage.
- Select Add → Directory. Enter backup-dir as the ID and the administrator-confirmed mount directory as Directory. Do not copy the example path into an arbitrary empty directory.
- In Content, select only VZDump backup file, or the equivalent Backup content label. Clear unrelated types such as Disk image and ISO image. The common default local-lvm storage is LVM-thin storage for virtual disks; it is not a filesystem directory for ordinary VZDump archive files.
- Restrict Nodes to the nodes on which that mount actually exists, pve01 in this example. Leave Shared unchecked for an independent local disk. Shared describes storage that is already shared underneath; it does not create sharing or copy files between nodes.
- Save, select backup-dir under pve01, and inspect its Summary and Backups or content view. An empty backup list is expected before the first task.
After saving, ask the administrator to verify that missing-mount protection applies to the newly created backup-dir storage ID, rather than only an older entry or path. Stop before running a backup if that protection is unconfirmed. Do not unplug a device carrying production tasks just to test it.
Confirm that the storage is enabled, capacity matches the administrator's record, node scope is correct, and the content type supports backups. If it does not appear in the backup destination selector, check those settings and mount availability. Changing the source VM's disk storage is not the remedy.
4. Choose a backup mode and check disk coverage
Open VM 100 → Hardware. Inspect every system and data disk and its Backup setting. A task can finish successfully while a deliberately excluded disk remains unprotected. Inventory external file shares, remote application data, passthrough devices, and other dependencies separately; do not assume that a VM archive protects them.
Under Options, inspect QEMU Guest Agent. The guest-side agent must be installed and running, and its use must be enabled in PVE. Selecting a checkbox alone does not make the service available. Filesystem freeze and thaw can improve consistency, but they are not a universal application-consistency guarantee. A database still needs the backup and recovery checks required by its own vendor.
| Mode | When to consider it | Boundary |
|---|---|---|
| Snapshot | The VM must keep operating and the consistency risk is understood | Live VM backup does not require snapshot-capable underlying storage; guest-agent coordination may improve consistency |
| Stop | A short approved interruption is acceptable | An orderly shutdown establishes the initial state; a previously running VM can resume after backup begins, rather than staying off for the entire copy |
| Suspend | Not selected for this example | A longer pause does not necessarily improve consistency |
Choose a low-risk VM and an approved window for the first test. Unexplained guest-agent errors, an unclean shutdown, or unresolved application requirements are reasons to stop expanding the rollout and involve the service owner. See the official Proxmox backup description for the mechanism behind these mode choices.
5. Run one manual backup and preserve the result
- Select VM 100 → Backup → Backup now.
- Choose backup-dir as Storage, the mode agreed above, and ZSTD compression. Check that the selected VM is the intended source.
- Start the task and keep its task window open. Inspect the VM ID, target, included disks, and progress in the log. Preserve errors rather than dismissing agent, read, or capacity failures.
- Wait for the completed task status to be OK. Also resolve any warnings about consistency or excluded data. A progress bar reaching 100% is not the acceptance criterion.
- Open backup-dir → Backups and match the new entry's timestamp, VM ID, and size to the task. Save the task log and backup identifier, then recheck remaining capacity and host health.
Keep existing recovery copies during this first test. Do not delete the last usable backup merely to make room. Define retention only after the recovery test, capacity measurements, and business requirements are understood. A regular file-storage archive is not automatically a deduplicated incremental repository, so do not size it on that assumption.
6. Restore to an unused VM ID
The source VM 100 stays unchanged. This is a recovery drill, not an in-place disaster-recovery overwrite.
- Select backup-dir under the node and open Backups. Select the newly created VM 100 backup and choose Restore. Enter through the storage backup list to avoid accidentally using an existing VM's overwrite workflow.
- Enter the unused VM ID 200. If the dialog instead targets an existing VM or does not let you choose the new ID, cancel and return to the storage backup list.
- Set Storage to the destination for the restored virtual disks. This is distinct from the location of the source archive. Check content support and real free capacity.
- Leave Start after restore disabled. If the installed release offers Add to HA, leave it disabled too. This file-backup example does not use the PBS Live Restore workflow.
- You may enable Unique to generate unique MAC addresses. That does not change a guest's static IP address, hostname, database identity, scheduled jobs, or application credentials. It is not a replacement for disconnecting the NICs.
- Recheck the target node, unused ID, disk destination, and disabled immediate startup, then restore. Wait for task completion. On failure, preserve the original VM and archive; do not delete unidentified volumes to make a retry succeed.
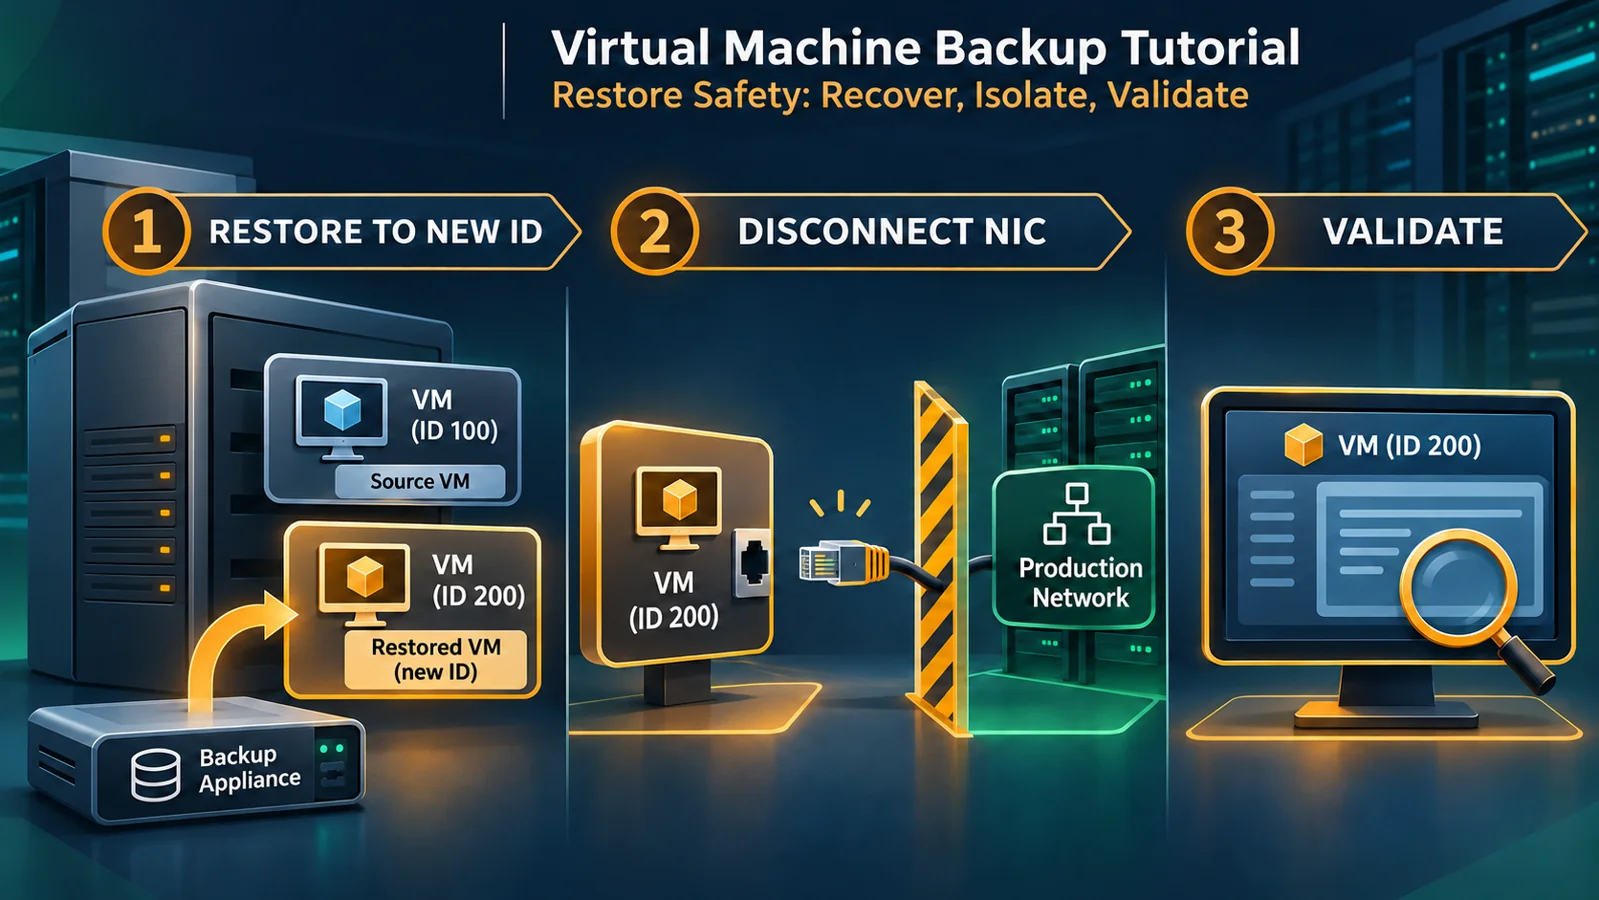
A new VM ID prevents a platform-object collision. Disconnected interfaces prevent the recovered guest from immediately joining the production network. Both controls are required.
7. Isolate the restored VM before its first boot
Do not click Start yet. Select VM 200 → Options and set Start at boot to No. Confirm that HA and external automation will not start the copy. Avoid node restarts or automated startup actions during the drill.
Under Hardware, open each Network Device → Edit, expand Advanced if necessary, enable Disconnect, and save. Repeat for every NIC, not only the first one. If the recovered configuration includes a passthrough NIC, shared disk, physical disk, or another route to production resources, have the administrator eliminate that path before startup. Disconnect on a virtual NIC does not isolate those other devices.
After confirming isolation, start VM 200 manually and log in through Console. Do not reconnect it to the office network just to make remote desktop convenient.
| Layer | What to verify | If it fails |
|---|---|---|
| Boot | Expected OS and disks, no emergency mode or boot errors | Inspect firmware, controllers, and restore logs before application testing |
| Files | Representative pre-backup folders, file counts, and contents | Preserve differences and check excluded disks |
| Application | Owner checks configuration, logs, and offline-accessible data | A running process alone does not prove recovery |
| Database | Vendor-approved consistency, records, and recovery-point checks | Escalate to the DBA; do not improvise a repair |
| Isolation | All NICs stay disconnected; no production share or passthrough access | Stop the copy and correct isolation |
| Business target | Observed recovery time and data age meet the agreed objective | Revise the design; a successful boot is insufficient |
Network-dependent tests need a separately designed test network with no production uplink. Before connecting, disable or reconfigure the copy's outbound email, payments, synchronization, monitoring callbacks, and scheduled jobs, and obtain the service owner's approval for test addresses and dependencies. The pfSense guest VLAN isolation guide explains useful rule-verification concepts, but an existing guest network is not automatically a safe recovery laboratory. This procedure does not require altering the production network.
8. Stop conditions, rollback, and cleanup
Pause if the mount is unverified, capacity is insufficient, disk reads fail, warnings are unexplained, a restore would overwrite the source, or isolation and production dependencies are uncertain. Do not remove these gates by skipping disks, connecting the copy to production, forcing an overwrite, or deleting older recovery copies.
Rollback from a failed drill means stopping the restored copy, preserving VM 100 and its backup, and recording the failure. If the copy accidentally joins production, disconnect or stop it immediately and ask the service owner to inspect duplicate addresses, outbound tasks, and possible data writes. Disconnecting later cannot undo actions already sent to external systems.
After a successful drill, shut down VM 200 and save the acceptance record. If the copy is no longer required, verify its VM ID and volume ownership before deleting only that test VM. Preserve the source VM, backup storage, and unrelated volumes. Repeat the drill after significant changes to VM disks, applications, or the backup design.
FAQ
Is a VM snapshot enough?
No. A failure of the source storage may affect both the VM and snapshots on that storage. Independent backup storage addresses part of that risk; offline, off-site, and permission-separated copies address additional failure and ransomware scenarios.
Why is an OK backup task not the final result?
It does not establish application consistency, coverage of excluded disks or external data, or the business recovery objective. Inspecting an isolated restored copy provides evidence within the actual test scope.
Does Unique eliminate duplicate-IP risks?
No. A new MAC address does not rewrite a static guest IP or business identity. Disconnect every NIC first, then use an approved test-network plan if networking is needed.
Can local-lvm hold the archive?
The common default local-lvm is block storage for virtual disks, not a directory for regular VZDump backup files. Select file storage that supports backup content, or design a separate Proxmox Backup Server deployment.
Related solutions
For help defining backup media, recovery objectives, and ownership of recovery drills, contact Yuqi enterprise IT services. Agree on acceptable data loss and service restoration time before choosing the platform design.
Further reading and official references
- Proxmox Directory storage: file-storage purpose and boundaries.
- Proxmox Restore dialog implementation: target ID, disk destination, uniqueness, and startup controls.
- pfSense guest VLAN isolation: a related network-isolation walkthrough.